Installing heavy-duty shading on commercial crop structures demands precise engineering protocols to mitigate dynamic wind shear and prevent catastrophic canopy failure. The correct step-by-step installation process requires assessing the underlying structural grid, aligning the polymer’s primary tensile orientation, applying calculated mechanical tension to eliminate aerodynamic flutter, and securing the perimeter with load-distributing fasteners. Improper deployment over large-acreage installations frequently results in localized friction tearing, collapsed steel hoops, and ruptured edge seams. By executing a verified installation sequence that accounts for the thermal expansion coefficient of High-Density Polyethylene (HDPE), enterprise facility managers can guarantee that their Shade Net investment delivers decades of stable microclimate protection and maximum agricultural yield.
Table of Contents
- 1. Phase 1: Pre-Installation Infrastructure Assessment
- 2. Phase 2: Material Orientation and Tensile Alignment
- 3. Phase 3: The Initial Deployment and Hoisting Sequence
- 4. Phase 4: Mechanical Tensioning and Flutter Elimination
- 5. Phase 5: Hardware Selection and Perimeter Securing Matrix
- 6. Phase 6: Post-Installation Auditing and Lifecycle Maintenance
- 7. Frequently Asked Questions (FAQ) on Field Installation
Phase 1: Pre-Installation Infrastructure Assessment
Before unrolling any protective fabric, installation crews must conduct a rigorous physical audit of the underlying framework. The vast majority of premature material ruptures do not stem from ultraviolet degradation, but rather from mechanical chafing against abrasive structural components.
Inspect all galvanized steel frames, multi-span arches, and tensioned cable grids for sharp edges, protruding bolts, and welding burrs. Any irregular metal surface will act like a saw blade against the polymer filaments when the wind causes the canopy to vibrate. To neutralize these hazards, apply specialized heavy-duty anti-chafing tape or smooth PVC slip-covers over all structural joints. As a leading Shade Net manufacturer located in the industrial hub of Lizhuang, Xinhang emphasizes that failing to smooth the structural contact points voids the operational integrity of even the highest-grade protective netting.
Additionally, verify the structural load-bearing capacity of your perimeter ground anchors. When a high-density panel is pulled taut across a large surface area, it acts as an enormous sail. The anchor posts must be set deep into concrete footings or utilizing heavy-duty helical earth anchors to withstand the sheer lateral force generated during seasonal storm events.
Phase 2: Material Orientation and Tensile Alignment
Commercial netting is an engineered textile with distinct directional properties. Recognizing the machine direction (warp) and the cross-machine direction (weft) is critical for structural stability.
The warp direction runs the continuous length of the roll and bears the highest linear tensile strength. The weft direction spans the width of the roll. When installing an Agricultural Shade Net over a multi-span greenhouse or high tunnel, the length of the roll (warp) must be pulled horizontally across the longest span of the structure, parallel to the ground layout. This orientation ensures the highest-strength polymer threads absorb the primary wind load.
Furthermore, determine which side of the mesh should face the sky. High-performance netting featuring aluminized or reflective pearl coatings are directional; the reflective side must face outward to deflect solar near-infrared (NIR) radiation. Factory-finished panels from Xinhang are clearly marked and feature robust selvedge edge reinforcement—heavy-duty multi-layered polyester webbing sewn along the borders. These reinforced edges must align directly with the primary tensioning cables or baseboards of the structure to ensure equal tensile load distribution.
Phase 3: The Initial Deployment and Hoisting Sequence
Unrolling bulk fabric directly onto rough agricultural soil or gravel risks introducing micro-abrasions that severely weaken the High-Density Polyethylene (HDPE) filaments before the canopy even experiences a wind load.
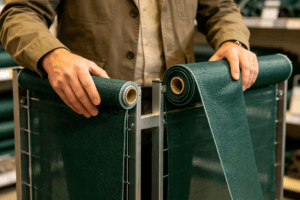
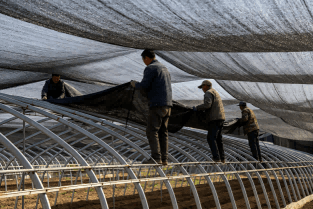
The safest deployment method involves utilizing a raised spooling rig or mounting the roll on a mobile forklift spindle. For large A-frame or Quonset structures, tie specialized hoisting ropes (pull-lines) to the reinforced leading edge of the net. Position installation crew members evenly along the length of the roll. On command, carefully pull the netting up and over the structural hoops, maintaining even, synchronized tension.
Never drag the fabric aggressively over bare metal. Once the net is draped over the structure, secure it loosely using temporary spring clamps or temporary zip ties. Do not permanently lock down any single section during this phase. The entire panel must be allowed to settle into its ambient temperature state before final mechanical tensioning begins.
Phase 4: Mechanical Tensioning and Flutter Elimination
The single most critical step in canopy installation is achieving correct tensile load distribution. A loose net will suffer from continuous aerodynamic flutter. This violent mechanical shaking forces the yarns to rub against themselves and the support structure, causing rapid friction degradation and eventual rupture.
Due to the inherent elasticity of a lockstitch knitted matrix, installers must stretch the fabric slightly to achieve a drum-tight fit. Start tensioning from the highest structural point (the center ridge) and work symmetrically down toward the gutters or baseboards.
Temperature Considerations: HDPE expands in high heat and contracts in the cold. If you install an Outdoor Shade Net early on a cold morning and pull it drum-tight, the material will expand as the afternoon sun heats it, resulting in midday sagging. Conversely, installing it on a very hot afternoon and pulling it tight can lead to extreme shrinkage forces during a cold night, potentially snapping attachment grommets. The optimal protocol is to install the net during moderate, average daily temperatures (typically mid-morning), allowing the polymer’s thermal memory to stabilize perfectly across the structural grid.
Phase 5: Hardware Selection and Perimeter Securing Matrix
The hardware utilized to secure the canopy dictates the ultimate survival of the installation. Piercing the raw fabric with bolts or generic wire guarantees failure. Enterprise operations rely on specialized load-distributing fastening systems.
| Fastener Type | Ideal Application Environment | Load Distribution Efficiency | Installation Mechanism |
|---|---|---|---|
| Aluminum Lock Channel & Wiggle Wire | Continuous attachment along steel baseboards, high tunnels, and multi-span gutters. | Exceptional. Distributes tension perfectly along an unbroken linear line. | Fabric is draped over the C-channel; spring-steel wire is locked in with a zig-zag motion. |
| High-Density Polymer Butterfly Clips | Suspended wire grids, tension cables, and mid-span bracing points. | High. Jaws clamp down on multiple micro-loops to prevent point-tearing. | Folded over the cable and pressed firmly through the fabric until the locking teeth snap shut. |
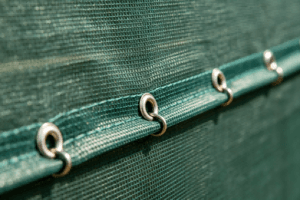
| Factory Brass Grommets (Eyelets) | Heavy-duty perimeter walls, custom sized panels, and temporary seasonal structures. | Very High. Must be embedded in taped edge webbing to prevent pulling out. | Secured to framework using heavy-duty UV-stabilized bungee cords or steel carabiners. |
| Lacing Cord / UV-Treated Twine | Joining two separate panels edge-to-edge in open-field applications. | Moderate. Relies on the skill of the installer to weave tight, consistent loops. | Manually threaded through the selvedge edges using a continuous spiral lacing technique. |
Phase 6: Post-Installation Auditing and Lifecycle Maintenance
An installation is not complete until it survives its first major weather event. Approximately one to two weeks after initial deployment, or immediately following the first heavy rain or wind storm, the structural grid must be audited.
During the initial break-in period, the polymer loops of the knitted matrix will align and stretch into their permanent shape. This settling process may result in slight canopy sagging. The installation crew must revisit the site, disengage the fasteners incrementally, re-pull the fabric to restore drum-tight tension, and re-secure the hardware.
For long-term lifecycle maintenance, keep the canopy free of heavy debris, fallen branches, and accumulated agricultural dust. Biofilm and dust reduce the light transmission capabilities and increase the weight load on the support grid. Wash the panels periodically using a low-pressure water stream. Do not use high-pressure power washers, as the intense water jet can fracture the polymer threads and strip away external UV coatings.
Frequently Asked Questions (FAQ) on Field Installation
Q1: How tight should I pull the netting during installation?
The netting must be pulled drum-tight. You should not see any ripples, waves, or sagging pockets across the surface. If you push up on the middle of a tensioned span with your hand, the fabric should immediately spring back into place without leaving a loose depression. A drum-tight fit is the only way to prevent destructive aerodynamic flutter.
Q2: Can I use standard zip ties to attach the fabric directly to a pipe?
Standard nylon zip ties should only be used for temporary positioning during the unrolling phase. Over time, standard zip ties degrade under UV exposure and become brittle. More importantly, a thin zip tie concentrates all the tension load onto a few individual micro-threads of the fabric, which will rip in a strong wind. Always use load-distributing polymer clips, aluminum lock channels, or reinforced grommets.
Q3: Should the shade net be installed on the inside or outside of a greenhouse plastic film?
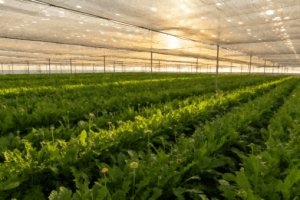
For maximum cooling efficiency, install the shade canopy on the outside (exterior) of the plastic greenhouse film. This intercepts solar radiation before it passes through the clear plastic, preventing the greenhouse from trapping thermal energy. Interior installations are primarily used for retractable thermal screening systems or in regions where exterior winds are too violent to support an external canopy.
Q4: How do I correctly join two separate rolls together over a large field?
Never attempt to glue or tape structural seams. You must overlap the reinforced selvedge edges of the two rolls by at least 10 cm. Using specialized UV-stabilized lacing cord or monofilament twine, stitch the two panels together using a continuous spiral lace pattern, securing the cord to the structural support cable running beneath the seam. Alternatively, order pre-sewn custom panels directly from the manufacturer to avoid field sewing entirely.
Q5: What is the ideal weather condition for installing agricultural mesh?
Installations should be executed on a dry, calm day with wind speeds below 10 mph. High winds can easily catch a loose panel during hoisting and injure the installation crew or damage the steel framework. Temperature-wise, aim for an ambient temperature of around 20°C to 25°C to allow the polymer to sit at its median thermal expansion state before you lock it down.
Q6: Should I remove the netting during the winter months?
If your operation is located in an area that experiences heavy seasonal snowfall, the netting must be removed or fully retracted before winter. While highly durable against wind, the porous mesh structure will trap freezing rain and snow. The accumulation of heavy, wet snow will quickly exceed the weight-bearing limits of the steel frame, leading to a total structural collapse of the greenhouse.
References & Technical Installation Standards:
- Greenhouse Fastening and Aerodynamic Load Limits: Greenhouse Megastore Hardware Specs
- Polymer Tensioning and Thermal Deformation Mechanics: Farm Plastic Supply Field Protocols
- Multi-Span Wiggle Wire and Cable Grid Integration: Greenpro Ventures Installation Diagnostics